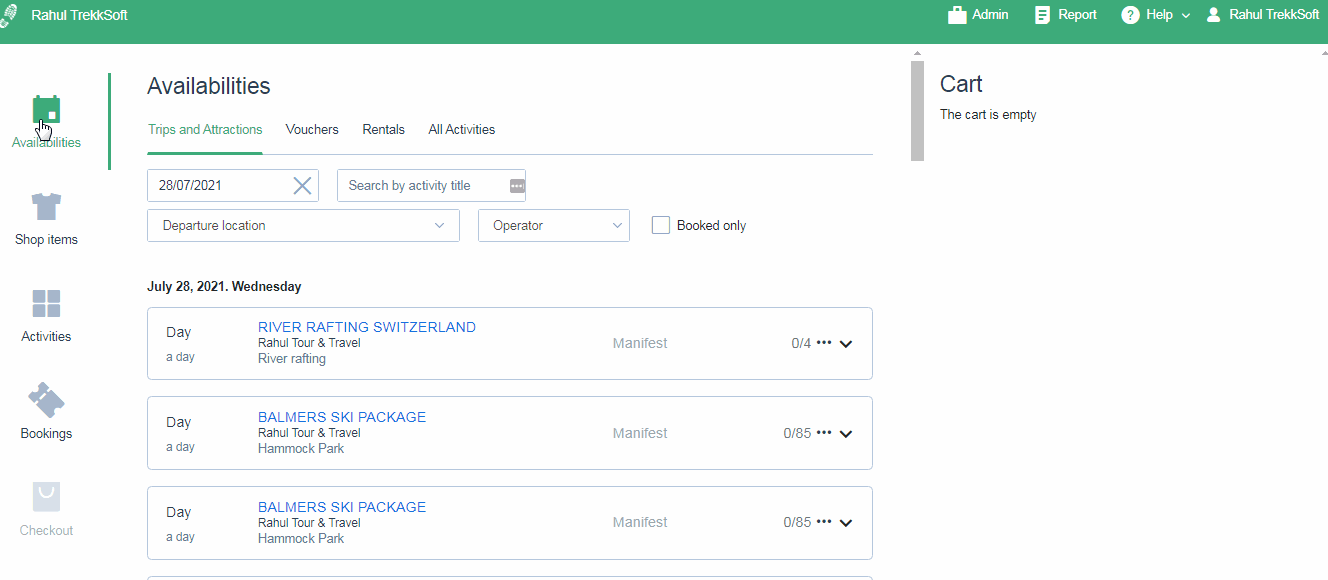


Event availabilities will always be shown in a Calendar View, starting with the next upcoming activity.
You can filter availabilities by:
- Schedule type (Trips and Attractions, Vouchers, Rentals)
- Departure date
- Activity Title (A to Z)
- Departure location
- Operator

Here you’ll find a list of all activities created for you. Click on any activity to start the booking process, or click on ‘More Details‘ to get a detailed description and view images of each activity.
You can filter your activities by any of the following:
- Activity title
- Departure location
- Operator

The bookings tab shows all your recent bookings. You can filter bookings by:
- Basket ID, user details, or activity title
- Trip Date
- Booking Date
From the list of bookings, you can click on any booking to download tickets, remove guests, check the full details of the booking (guest names, etc) or cancel the entire booking. You can also rebook guests or rebook activities, as well as access the guest manifest.

You’ll also notice that each booking Price is color-coded. Here’s what the colors indicate:
Green – Even balance
Red – Cancelled booking
Orange – Outstanding payment or Overpaid
Purple – Unconfirmed booking
To download tickets for a booking, follow these steps:
- On the left-hand menu click on Bookings
- Then choose the booking you wish to view by clicking anywhere on the booking information. A popup window will open.
- In the popup window, scroll to the bottom and click the Download tickets button.

On the checkout page, you can see an overview of your booking. Here, you’ll get the chance to modify the booking, add guest details, change agent, add a discount code or package discount or change the buying user.

In the Checkout section, you have the following options:
- The ellipsis button (3 dots) – Click this option to edit or delete the current booking
- Recycling Bin – Click this icon to remove the booking. You will receive a warning to make sure you wish to delete the incomplete booking.
- Guest Remarks – Enter any information the guest wishes you to make note of e.g. dietary requirements
- Basket Item Remarks – Enter any additional comments you wish to add to the basket (This will only be visible inside the basket once the booking is complete)

In the Cart section, you have the following available options:
- Agent – Select the agent from the dropdown who is completing the booking
- Voucher Code – Enter a voucher code if the guest wants to use a voucher discount
- Multi-Discount – If the activity is part of a package discount, the information will appear here
- Buying Users email – This field is filled automatically but you have the option to manually edit if necessary
- Buying Users name – This field is filled automatically but you have the option to manually edit if necessary
- Email tickets – Check this option to send emails to buyers containing tickets.

During Checkout, click Add quest info (in red) to bring up a popup for guest info. You have the following available options:
- Apply data to all guests – Mark this box if you want all the guests to have the same personal info.
- Buying user -Mark this box if the personal info you are inputting is for the person who is ordering the ticket and is the person of contact for managing the booking i.e. Tick this option if you want the Logged in user as Buyer.
- Gender – Choose Male or Female.
- First name – Please write the guest’s first name.
- Last name – Please write the guest’s last name.

To be able to send out a payment link, you need eventually to change the buying user. This functionality was added on top of the Booking detail section. Here you can change it by searching for an existing one or by creating a new one.

In the Booking itself find the option to create a payment link (either to copy it or to send it directly).

During Checkout, click the Pay button to bring up a popup for payment options.

You have the following available options:
You have two options here to mark the booking. Reserve without payment and take payment later via the payment link or Take cash on the counter and Book as Paid.


